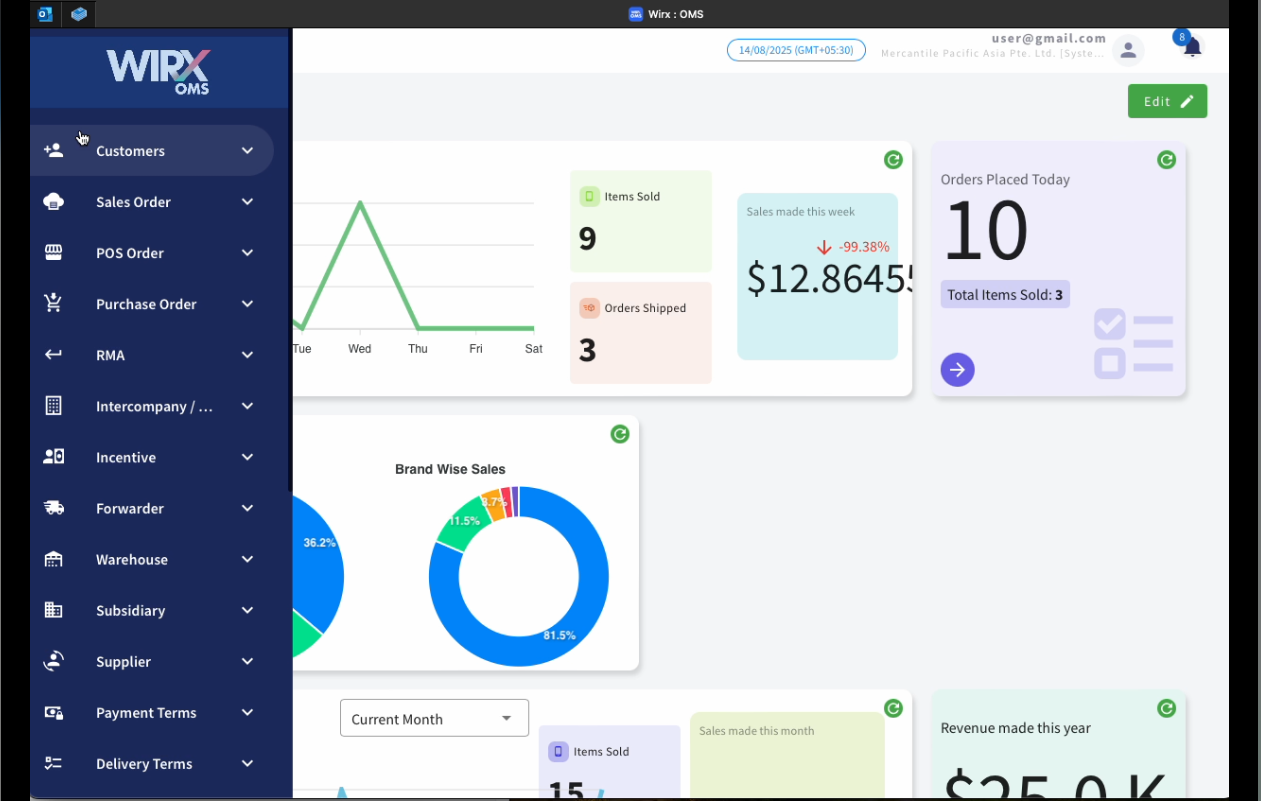
Customers Module
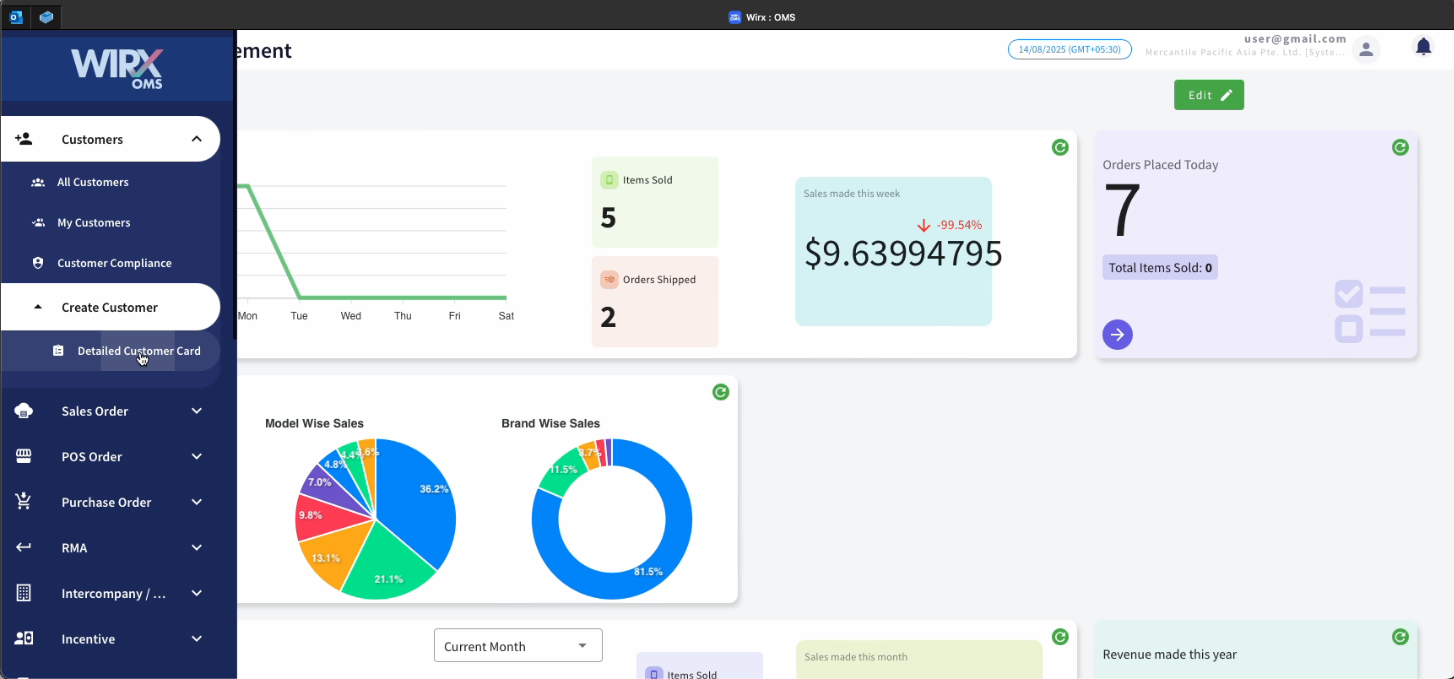
The Customers module in WIRX OMS allows users to create and manage customer information, view customer lists, and access compliance data. The interface provides quick access to customer records, compliance reports, and tools for adding new customers.
1 Customers
Overview
The Customers module in WIRX OMS allows users to create and manage customer information, view customer lists, and access compliance data. The interface provides quick access to customer records, compliance reports, and tools for adding new customers.
Navigation Menu (Left Sidebar)

1.1 Create Customer
The Create Customer feature in WIRX OMS allows users to add new customers to the system by entering their details through a guided, multi-step form. This process ensures that all relevant customer information is captured for operational, sales, and compliance purposes.
How to Create a Customer.
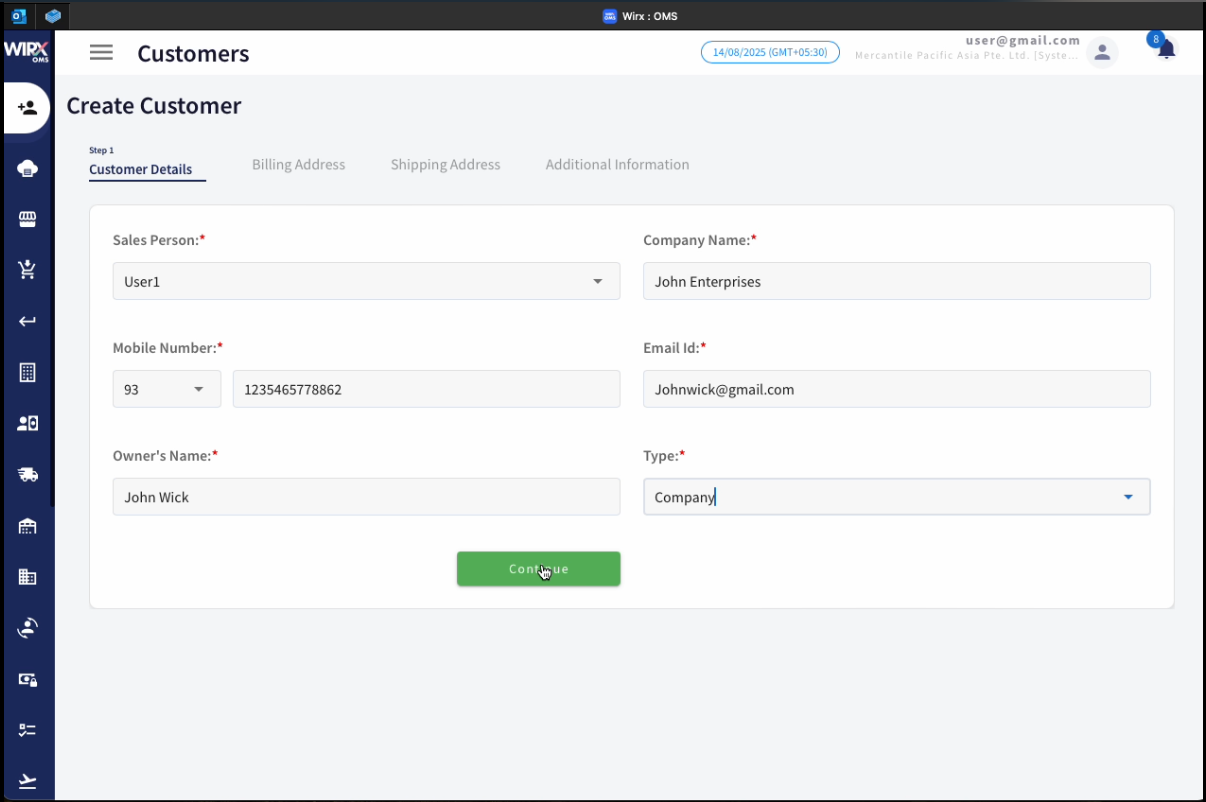
1.1.1 Steps to Create a Customer
Step 1 – Customer Details
This section collects essential customer information:
-
Sales Person (Required) – Assign a sales representative responsible for managing the customer.
-
Company Name (Required) – Enter the legal name of the customer’s company.
-
Mobile Number (Required) – Include the country code and phone number.
-
Email ID (Required) – Provide a valid email address for correspondence.
-
Owner’s Name (Required) – Record the name of the business owner.
-
Type (Required) – Select the type/category of customer from the dropdown list.
Action: Click Continue to proceed to the next step.
Step 2 – Billing Address
This step captures billing-related contact and location information:
-
Contact Person (Required) – Name of the billing contact.
-
Company (Required) – Customer company name (can be same as above).
-
Mobile Number (Required) – Contact’s phone number with country code.
-
Address Line 1 & 2 (Required) – Complete billing address.
-
Address Line 3 (Optional) – Additional address details.
-
Postal Code (Optional) – Postal or ZIP code.
-
Country (Required) – Select country from dropdown.
Action: Click Continue to proceed.

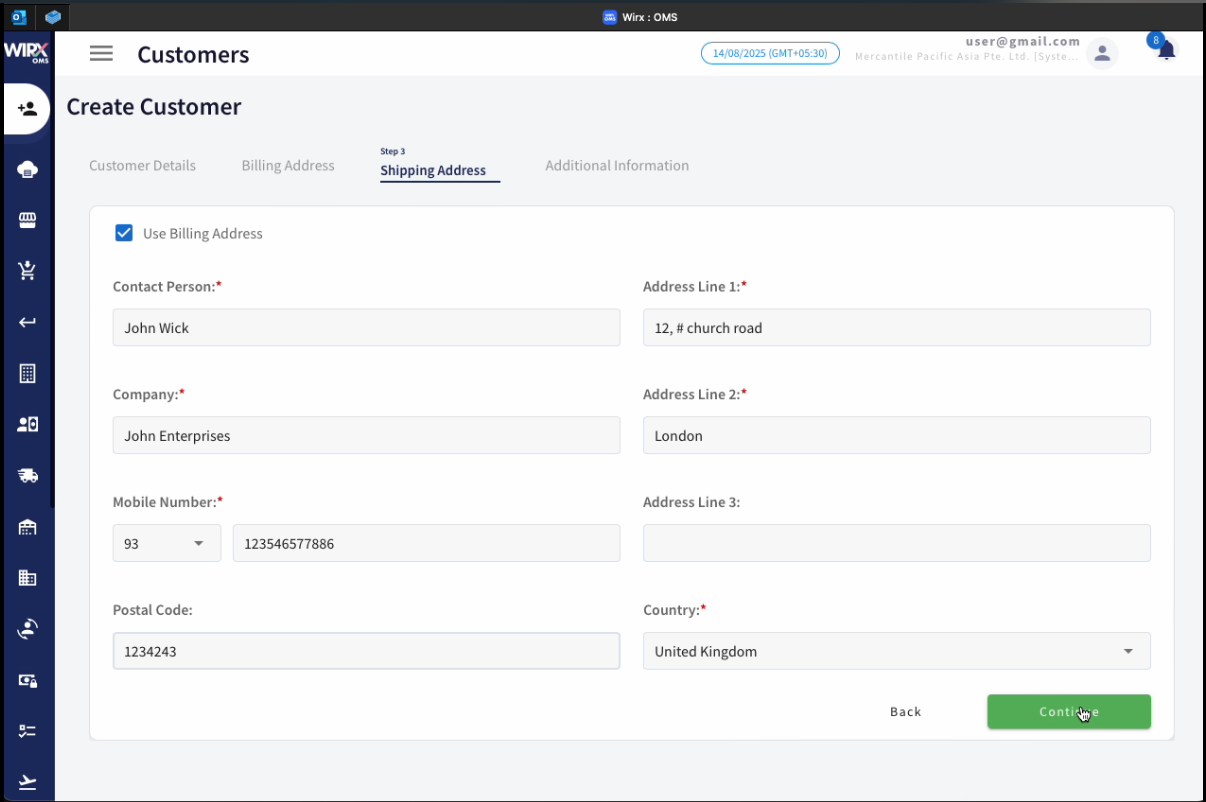
Step 3 – Shipping Address
This step records the customer’s shipping address:
-
Use Billing Address – Checkbox to auto-fill fields with billing details.
-
Contact Person (Required) – Name of the receiving contact.
-
Company (Required) – Company name for shipment.
-
Mobile Number (Required) – Contact number for deliveries.
-
Address Line 1 & 2 (Required) – Complete shipping address.
-
Address Line 3 (Optional) – Additional delivery instructions.
-
Postal Code (Optional) – Postal or ZIP code.
-
Country (Required) – Select from dropdown.
Action: Click Continue to proceed.
Step 4 – Additional Information
This step gathers compliance and supporting documentation:
-
VAT/GST Number – Customer tax registration number.
-
Remarks – Any relevant notes about the customer.
-
Tax Certificate – Upload or attach a file.
-
Business Registration Certificate – Upload or attach a file.
-
ID Proof (Passport or Driving License) – Upload or attach a file.
Action: Click Continue to proceed.

After the customer is created, the record remains pending approval and is forwarded to Customer Compliance for review and final approval.
1.2 Customer Compliance
The Customer Compliance section ensures that all customers meet the necessary legal, regulatory, and internal business requirements before engaging in transactions. It provides an interface to review, approve, or reject customer documentation, assign sales representatives, and manage compliance statuses.
How to Approve a customer and Assign multiple sales rep to a customer.
Customer Compliance List View
This screen displays all customers whose compliance status needs to be checked or managed.
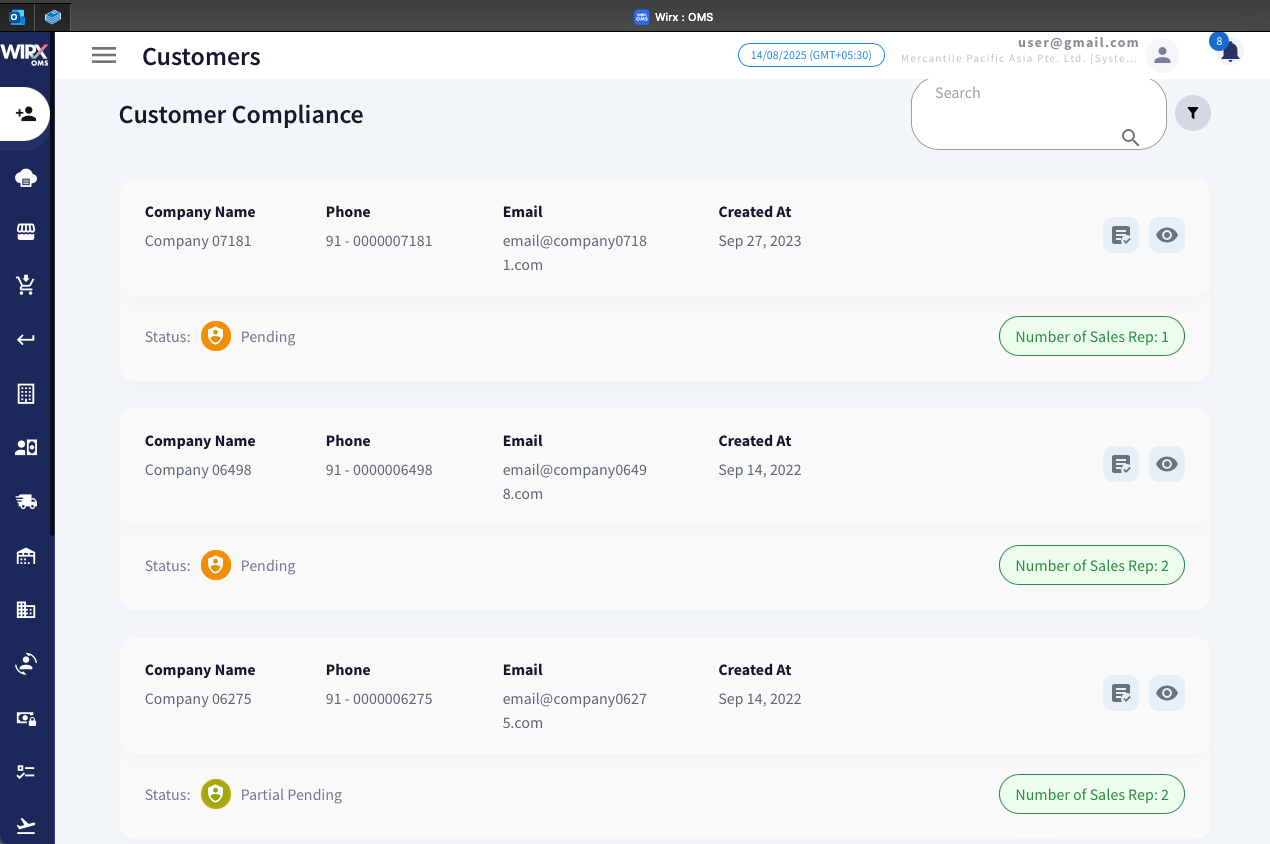
Displayed Information:
-
Company Name – Registered name of the customer’s company.
-
Phone – Customer’s contact number.
-
Email – Primary contact email address.
-
Created At – Date the customer record was added to the system.
-
Status – Compliance status of the customer:
-
ICON Status Overview 
Pending
Awaiting document review and approval.

Partial pending Document review partially completed -
Number of Sales Representatives – Number of sales reps assigned to the customer.

Actions Available:
| ICON | NAME | ACTION |
|
|
Assign Sales Reps | Allocate one or more sales representatives to the customer. |
|
|
View Compliance Details | Open a detailed compliance review screen. |


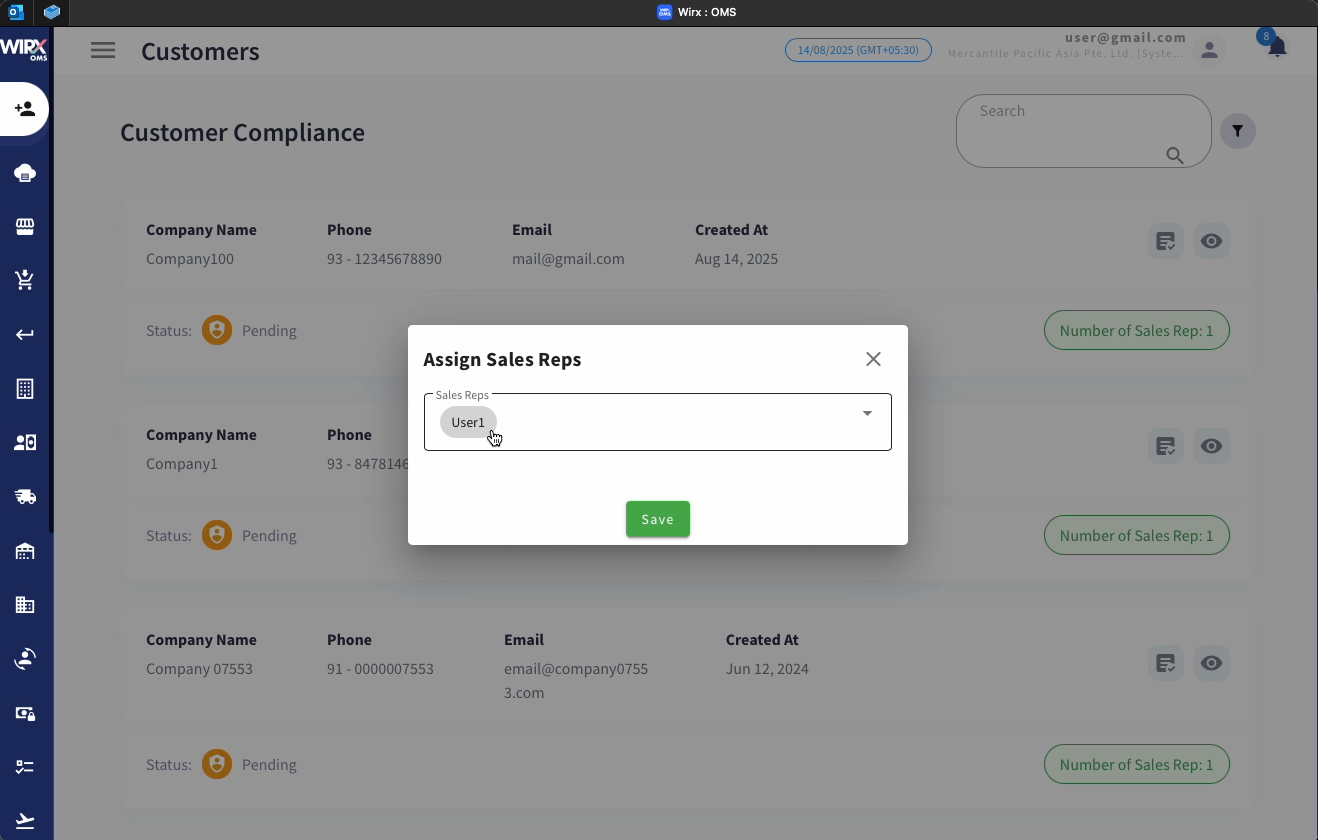
Assign Sales Reps Pop-Up
When assigning sales representatives, a pop-up form appears:
-
Sales Reps Dropdown – Select one or more users from the list.
-
Save Button – Confirm the assignment.


View Compliance Details
When viewing a specific customer’s compliance details, the screen is divided into two main sections:

Customer Information Panel
-
Status – Displays the customer’s current compliance status.
-
Contact Person – Name of the customer’s representative.
-
Phone Number – Customer’s contact number.
-
Email Address – Primary communication address.
-
Channel Name – Sales or operational channel.
-
GST/VAT – Indicates if tax-related information is available.
Documents Section
Lists all required compliance documents such as:
-
Tax Certificate – Proof of tax registration.
-
Registration Certificate – Proof of business registration.
Actions per Document:
-
View – Open and inspect the uploaded document.
-
Reject – Mark the document as non-compliant (with reason in the backend).
-
Approve – Mark the document as compliant.
Billing Details Section
Shows the customer’s billing address and contact details.
-
Select All Checkbox – Select multiple entries for bulk approval/rejection.
-
Approve / Reject Buttons – Approve or reject the billing information.
1.3 All Customers
- Displays the complete list of customers in the system.
- Allows filtering, searching, and sorting customers.
- Useful for accessing full customer records.
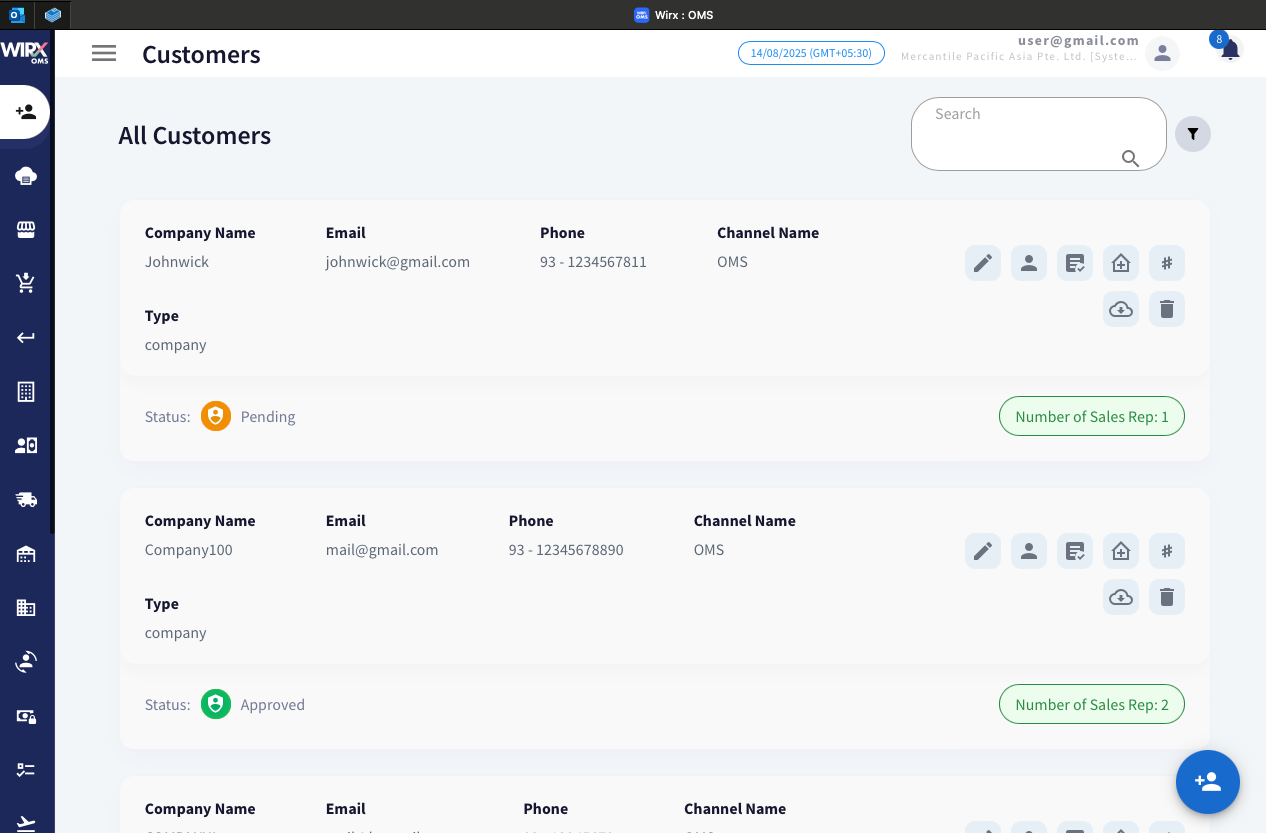
Features and Actions
Search Bar – Allows quick keyword-based searching for customers by name, email, or other details.
Filter Option – Enables applying filters to narrow down the displayed customer list based on specific criteria (e.g., status, channel).
| ICON | NAME | ACTION |
| Edit | Modify existing customer details such as name, contact information, and channel. | |
| Customer Type | Specify the customer type (e.g., Premium, Activation) and set the associated expiry date. | |
| Assign Sales Rep | Assign one or more sales representatives to manage the customer. | |
| Manage Address | Add, edit, or update the customer's billing and shipping addresses. | |
| Update NS Internal ID | Update the customer's NetSuite Internal ID for system integration purposes. | |
| Download Certificate | Download any customer-provided proof or compliance certificates stored in the system. | |
| Delete Customer |
Permanently remove the customer record from the system. |
|
 |
Create Customer | Add a new customer by entering relevant details and compliance information. |
1.4 My Customers
The My Customers section displays a list of customers assigned specifically to the logged-in user. This feature helps sales representatives and account managers focus on their own portfolio of customers without browsing through the entire database.

Displayed Information
For each customer, the following details are shown:
-
Company Name – The registered business name of the customer.
-
Email – The customer’s primary contact email address.
-
Phone – The registered phone number.
-
Channel Name – The sales or operational channel to which the customer is linked (e.g., OMS).
-
Type – Customer classification (e.g., company, individual).
-
Status – Indicates the current approval state of the customer:
-
ICON Status Overview Pending
The customer’s details are under review and awaiting approval.

Approved
The customer has passed verification and is authorized for transactions.

Rejected
Compliance requirements not met. -
Number of Sales Representatives – Shows how many sales reps are assigned to the customer.
Features and Actions
-
Search Bar – Quickly find customers by name, email, or other details.
-
Filter Option – Apply filters to narrow down the customer list based on criteria such as status or channel.
-
Action Buttons (per customer record):
-
ICON NAME Action Edit Modify existing customer details such as name, contact information, and channel. Manage Address Add, edit, or update the customer's billing and shipping addresses. Update NS Internal ID Update the customer's NetSuite Internal ID for system integration purposes. Delete Customer Permanently remove the customer record from the system.
Create Customer Add a new customer by entering relevant details and compliance information.
-